“How to get” is a series in which I try to explain how to make popular synth sounds or synth sounds I used in my own productions.
In the next two articles I will explain how I did the bassline and the lead sound of my track “Open”
You can listen to the whole track here!
Main Loop
This is the main loop, consisting of the kick, the bass and the lead. The bassline and the lead are made with Ableton’s Operator, but you can apply the techniques to other synthesizers as well.
In this article I want to focus on how to make the bassline. So let’s start!
Bass Loop
The bassline in this track is a simple FM Bass. In order to achieve this sound you need Ableton’s Operator or any other synthesizer that’s capable of FM-Synthesis.
The midi file

FM settings
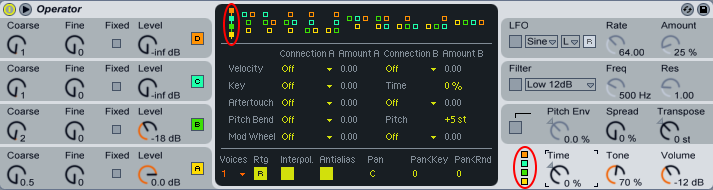
At first you have to use Operator in FM mode. To ensure this you have to bring the little cubes (which are representations of the four oscillators) in an vertical order (see the red markers). This sound only consists out of two oscillators. Oscillator B will modulate oscillator A to get that distinctive FM Bass sound. We won’t use the filter and it’s envelope for this sound. The next step would be to get the our two oscillators (tune, envelope, waveform) and the amount of frequency modulation right.
Oscillator A
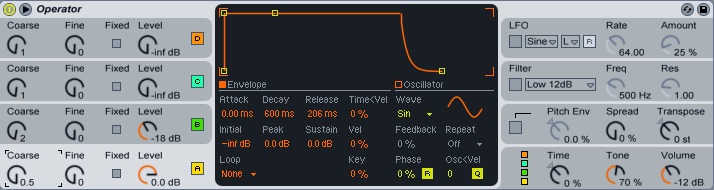
Oscilator A will provide the sub frequencies for our bassline. In order to achieve this you select a sinewave put the level to 0.0 dB and the Coarse to 0.5 (basically we pitched the sound one octave down). The envelope should look something like this:
Attack: 0.0 ms
Decay: 600 ms
Sustain: 0.0 dB
Release: 206 ms
Now we can move on to oscillator B
Oscillator B
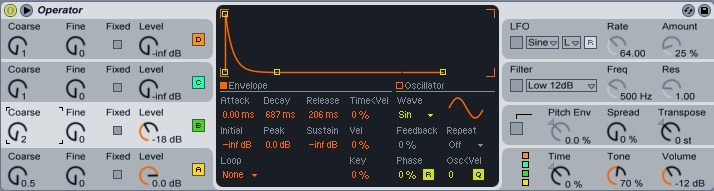
Since we use FM-Synthesis for this, oscillator B modulates oscillator A. You select a sinewave set the level to -18 dB and the Coarse to 2. In this case, the level is basically the amount of the modulation. To get that mettalic thump that we are looking for we have to adjust the envelope:
Attack: 0.0 ms
Decay: 687 ms
Sustain: -inf dB
Release: 206 ms
The sound is almost there. Now we just need some processing to make it sound even fatter.
EQ
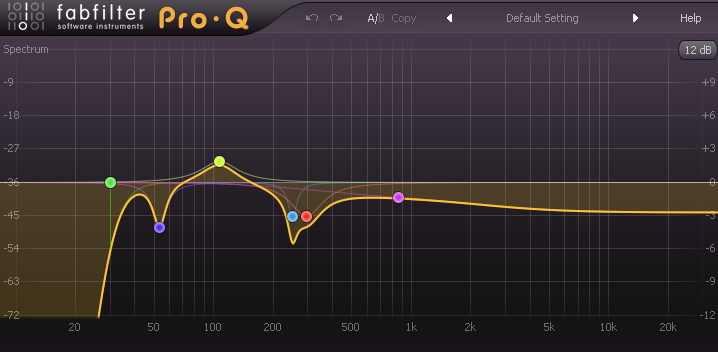
I think eqing sounds is a matter of personal taste. Having said that I put on a lowcut at 30 Hz to get rid of the super low frequencies. After that I dipped the bassline at 53 Hz, because that’s where the fundamental frequency of my kick is. A small boost at around 100 Hz to accentuate the knock of the bassline and some further dipping between 200-400 Hz. Finally I lowered some of the high frequencies with a high shelf to make room for the lead sound.
Compression
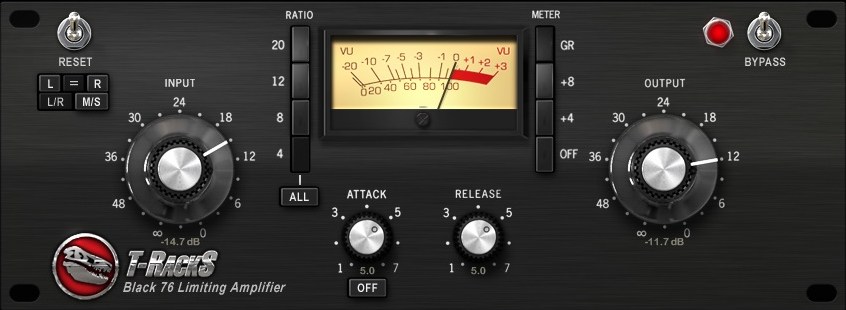
In terms of compression I used the T-Racks Black 76 (an emulation of the famous 1176 compressor). It’s important to know that the attack and release don’t work as they would on a normal compressor. If the attack is all the way to to right it actually means it’s that fastest attack not the slowest. If the release is all the way to right it means it’s the shortest release not the longest. Nothing more to say here.
Saturation
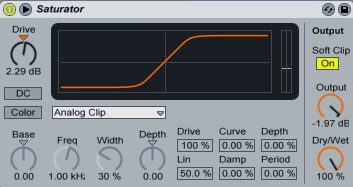
The saturation is just to fatten the sound up and make it sound a little bit warmer. It’s just the default preset of Ableton’s saturator with a drive of 2.29 dB. Nothing spectacular here.
Reverb
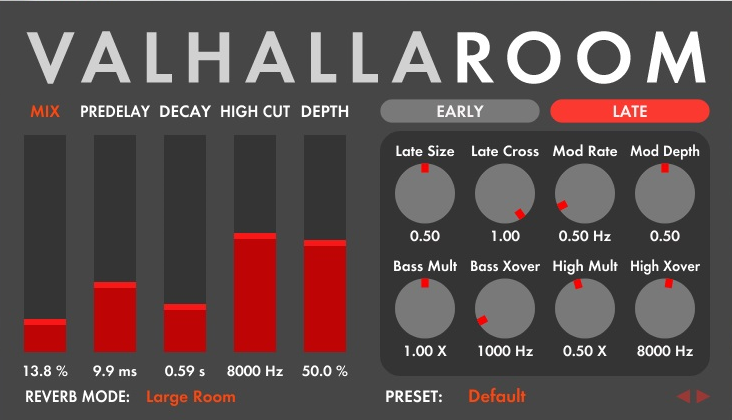
Yes I use reverb on a bass sound. Normally I wouldn’t do this but since there is a lot of space in this song and it’s a small amount of reverb it fills out the track pretty nicely. In terms of the settings it’s just the ValhallaRoom “Large Room” preset with the mix and decay tweaked to taste.
Sidechaining
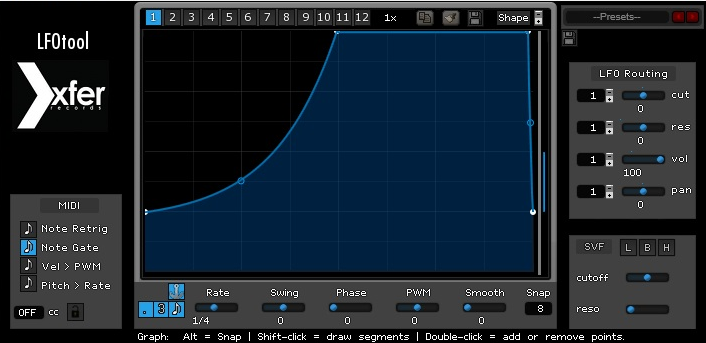
There’s not much to say about sidechaining. In this case I use the LFOtool instead of a compressor. Just a matter of personal taste.
And voilà we made the bass sound of “Open”. In the next article I will show you how I did the lead sound .